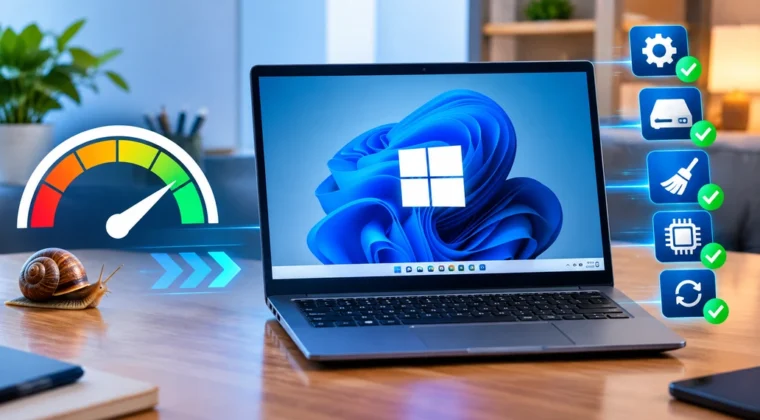
There are few things more frustrating than pressing the power button on a laptop you paid good money for and then waiting. And waiting. The spinning dots appear, the desktop loads halfway, the taskbar freezes for a moment, and by the time you finally open your browser, you have already lost three minutes of your morning.
If that sounds familiar, you are not alone. Slow performance is the single most common complaint from Windows 11 users, and the good news is that in the vast majority of cases it has nothing to do with your laptop being “too old.” Most slowdowns come from software clutter, background processes, storage pressure, thermal throttling, or outdated drivers — all of which you can fix yourself in an afternoon without spending a rupee.
This guide walks through fifteen practical fixes to speed up a slow Windows 11 laptop, arranged from the easiest and safest to the more advanced. Work through them in order, and test your machine after each one so you know which change actually made the difference.
Why Windows 11 Laptops Slow Down in the First Place
Before you start changing settings, it helps to understand what is actually happening under the hood. A laptop does not “wear out” the way a mechanical device does. What changes over time is the amount of work it is being asked to do.
When a laptop is new, it typically has a clean install, a mostly empty drive, fresh thermal paste, and only a handful of programs configured to launch at boot. Six months later, the same machine might be running a cloud sync client, two updater services, a gaming launcher, a printer utility, three browser extensions and an antivirus suite — all before you have opened a single application yourself.
The main causes of slowdown fall into five categories:
- Software load: too many startup and background programs competing for CPU and RAM.
- Storage pressure: a drive that is nearly full, or an older mechanical hard drive that cannot keep up with modern read/write demands.
- Memory limits: 4 GB or 8 GB of RAM being stretched across a heavy browser session and multiple apps.
- Thermal throttling: dust-clogged vents forcing the processor to reduce its clock speed to avoid overheating.
- Software faults: corrupted system files, outdated drivers, or a pending update that keeps retrying in the background.
Almost every fix below targets one of these five causes. Microsoft maintains its own official troubleshooting documentation at Microsoft Support, which is worth bookmarking if you want to cross-check any step.
1. Restart Properly Instead of Just Closing the Lid
This sounds almost too simple to include, but it resolves a surprising number of complaints.
Windows 11 uses a feature called Fast Startup, which saves part of the system state to disk when you shut down so that the next boot is quicker. The side effect is that a shutdown is not a true reset — memory leaks, stuck drivers and hung background services can survive it. If you habitually close the laptop lid instead of shutting down at all, the machine may not have had a genuine restart in weeks.
Click Start, select the power icon and choose Restart rather than Shut down. A restart always performs a full reboot, clearing memory completely.
If you want to disable Fast Startup entirely, open Control Panel → Power Options → Choose what the power buttons do → Change settings that are currently unavailable, then uncheck Turn on fast startup. Boot times will be slightly longer, but the system state will be cleaner every time.
2. Cut Down Your Startup Programs
This is the highest-impact fix on the entire list, and it takes about two minutes.
Press Ctrl + Shift + Esc to open Task Manager, then click the Startup apps tab in the left sidebar. You will see a list of every application configured to launch when Windows boots, along with a “Startup impact” rating of Low, Medium or High.
Right-click anything rated Medium or High that you do not need running constantly and select Disable. Common offenders include:
- Cloud storage clients (OneDrive, Dropbox, Google Drive) if you only sync occasionally
- Gaming launchers such as Steam or Epic Games
- Communication apps like Discord, Skype or Teams
- Printer and scanner utilities
- Manufacturer “update assistant” tools from Dell, HP, Lenovo or Asus
- Adobe Creative Cloud background services
Disabling a startup entry does not uninstall the program. You can still open it normally from the Start menu; it simply will not load itself automatically. Leave your antivirus and any touchpad or audio drivers enabled.
On a laptop with a long startup list, this single change can cut boot time in half and free up several hundred megabytes of RAM.
3. Check What Is Eating Your CPU and RAM Right Now
Sometimes the problem is not boot time but constant sluggishness during use. Task Manager will tell you exactly what is responsible.
Open Task Manager and click the Processes tab, then click the CPU column header to sort by processor usage, and then the Memory column to sort by RAM. Watch for a minute or two while the machine is idle.
What you are looking for:
- A single process sitting at 20–100% CPU while idle. This is usually an updater, an indexing service, or a misbehaving browser tab.
- Memory usage above 80% with only a few apps open. This points to either a RAM shortage or a memory leak.
- Disk usage pinned at 100%. On older laptops with mechanical drives this is extremely common and is the real cause of most “everything freezes” complaints.
If you spot a process you do not recognise, search the exact process name before ending it — some are essential Windows components. If it turns out to be a third-party program you do not need, uninstall it rather than repeatedly killing the task.
4. Free Up Storage Space
Windows needs free space to function. It uses the drive for virtual memory, temporary files, update staging and system restore points. Once free space drops below roughly 15% of total capacity, performance degrades noticeably, and below 5% the system can become genuinely unstable.
Go to Settings → System → Storage. Windows 11 displays a breakdown of what is consuming your drive.
Start with Temporary files. Select it and you will typically find several gigabytes across:
- Windows Update cleanup files
- Delivery Optimisation files
- Thumbnails and temporary internet files
- Previous Windows installations (this alone can be 15–25 GB after a major update)
- The Recycle Bin
Tick everything except Downloads unless you have checked that folder, then click Remove files.
Next, switch on Storage Sense from the same screen. It automatically removes temporary files and empties the Recycle Bin on a schedule, which prevents the problem from creeping back.
Finally, look at Apps & features and uninstall software you no longer use. Trial versions of office suites, old games, manufacturer bloatware and duplicate PDF readers add up quickly.
5. Turn Off Visual Effects and Animations
Windows 11 ships with a generous amount of animation — fading menus, sliding windows, translucent panels and shadow effects. On a machine with a dedicated graphics chip this costs nothing noticeable. On an entry-level laptop with integrated graphics, it adds a real layer of perceived lag.
Open Settings → Accessibility → Visual effects and turn off Transparency effects and Animation effects.
For finer control, press Windows + R, type sysdm.cpl, press Enter, go to the Advanced tab and click Settings under Performance. Choose Adjust for best performance to disable everything, or select Custom and keep only Smooth edges of screen fonts — leaving that one on keeps text readable while removing the rest of the overhead.
The interface will look flatter and more utilitarian, but menus will snap open instantly.
6. Update Windows and Your Drivers
Outdated drivers, particularly graphics and storage drivers, are a genuine and frequently overlooked cause of poor performance.
For Windows itself, go to Settings → Windows Update and click Check for updates. Install everything pending, then restart. A partially installed update can sit in a retry loop and consume resources indefinitely, so clearing the queue matters even if you do not want the new features.
For drivers, the best source is your laptop manufacturer’s support site rather than Windows Update, which often carries older generic versions. Search for your exact model number and download the current chipset, graphics, storage and network drivers.
If you have a discrete GPU, get the driver directly from the vendor — NVIDIA and AMD both publish regular performance-focused updates that Windows Update will not always push to you.
7. Scan for Malware
Persistent, unexplained slowdown accompanied by high CPU or network activity is a classic malware signature. Cryptocurrency miners in particular are designed to consume spare processing capacity quietly, and adware injects itself into browsers where it slows every page load.
Windows Security is built in and is genuinely capable. Open Settings → Privacy & security → Windows Security → Virus & threat protection, click Scan options, select Full scan and run it. A full scan takes one to three hours depending on drive size, so start it when you do not need the machine.
For a second opinion, a reputable on-demand scanner run alongside your existing protection can catch things a single engine misses. Avoid installing two real-time antivirus suites simultaneously, though — they conflict with each other and will make performance worse, not better.
For broader guidance on securing your machine, our Cybersecurity section covers practical protection in more depth.
8. Tame Your Browser
For most people the browser is the computer. It is also, almost always, the single largest consumer of RAM on the system.
Three things to do:
Audit your extensions. Open your browser’s extensions page and remove anything you do not actively use. Each one runs in its own process and consumes memory on every tab.
Limit open tabs. Thirty open tabs can easily consume 4 GB of RAM. Use bookmarks or a tab-suspension extension instead of keeping everything live.
Enable memory saving. Chrome and Edge both include a memory saver that puts inactive tabs to sleep and reloads them when you return. In Edge it is under Settings → System and performance; in Chrome, Settings → Performance.
Clearing cached data occasionally also helps, though it will log you out of sites and slow the first load of pages you visit often.
9. Adjust Your Power Plan
Laptops ship configured to prioritise battery life, which means the processor is deliberately held below its maximum clock speed. That is sensible when you are away from a socket and actively harmful when you are not.
Go to Settings → System → Power & battery and set the Power mode to Best performance while plugged in.
Also check Control Panel → Power Options for a High performance or manufacturer-specific plan. Some vendors add their own performance profiles that are more aggressive than the Windows defaults.
Keep in mind the trade-off: on battery, Best performance can cut runtime significantly and will make the laptop run hotter. Switch back to Balanced when you unplug.
10. Clean the Vents and Check Temperatures
This is the fix almost nobody tries, and on a laptop more than two years old it is frequently the real answer.
Laptops pull cooling air through small intake vents, usually on the underside. Over time these clog with dust, hair and fabric fibres — especially if the machine is regularly used on a bed, sofa or lap. When airflow drops, internal temperatures rise, and the processor responds by reducing its own clock speed to protect itself. This is called thermal throttling, and it can cut effective performance by 30–50% while showing no error message whatsoever.
The symptom pattern is distinctive: the laptop feels fine for the first few minutes after a cold boot and then progressively slows down, with the fan running loudly and the chassis becoming hot near the hinge.
What to do:
- Shut down and unplug the laptop completely.
- Use a can of compressed air in short bursts at the intake and exhaust vents, holding the fan still if you can see it, to avoid over-spinning the bearing.
- Always use the laptop on a hard, flat surface so the intakes are not blocked.
- Consider a laptop cooling stand if you run demanding workloads.
If cleaning does not help and the machine is out of warranty, thermal paste replacement by a technician is an inexpensive service that can restore substantial performance on a laptop three or more years old.
11. Repair Corrupted System Files
If Windows has been through a bad update, an abrupt power loss or a failed installation, core system files can become corrupted. The symptoms are erratic — random freezes, apps failing to launch, settings pages that will not open.
Windows includes two command-line tools that repair this automatically.
Right-click the Start button and choose Terminal (Admin) or Windows PowerShell (Admin), then run:
sfc /scannowLet it complete — it usually takes 10 to 20 minutes. If it reports that it found corrupt files but could not repair all of them, follow up with:
DISM /Online /Cleanup-Image /RestoreHealthThis one requires an internet connection because it pulls clean replacement files from Microsoft’s servers. When it finishes, run sfc /scannow again and then restart.
12. Disable Background Apps You Do Not Need
Windows 11 lets many apps run in the background to deliver notifications and fetch updates. Useful for a mail client; entirely unnecessary for a calculator.
Go to Settings → Apps → Installed apps, click the three-dot menu next to an app, choose Advanced options, and under Background apps permissions set it to Never.
Work through the list and switch off anything you do not need live notifications from. Weather widgets, news feeds, store apps, photo apps and games are all safe candidates.
While you are there, consider disabling the Widgets panel if you never use it — right-click the taskbar, choose Taskbar settings, and toggle Widgets off.
13. Add More RAM
We are now into hardware territory, but this is where the biggest gains live if you have exhausted the software fixes.
If Task Manager consistently shows memory usage above 80%, you do not have a software problem — you have a capacity problem. Windows compensates by swapping data to the drive, which is dramatically slower than RAM, and the result is the stuttering you feel.
Practical guidance for 2026:
- 4 GB: not workable for everyday multitasking. Upgrade is essential.
- 8 GB: the realistic minimum. Adequate for browsing and documents, tight for anything more.
- 16 GB: the comfortable sweet spot for most users, including light photo and video work.
- 32 GB: worthwhile for video editing, virtual machines, large datasets and heavy development work.
Before buying, check whether your specific model has accessible RAM slots — many thin laptops now solder memory to the mainboard, making upgrades impossible. Your manufacturer’s specification sheet or a service manual will tell you, along with the exact memory type and maximum supported capacity.
14. Upgrade to an SSD
If your laptop still uses a mechanical hard drive, this is the single most transformative upgrade available, and nothing else comes close.
A traditional hard drive reads data by physically moving a head across a spinning platter. A solid-state drive has no moving parts and accesses data electronically, delivering read speeds roughly 10 to 30 times faster. In practice, boot times drop from two minutes to fifteen seconds, applications open instantly, and the “100% disk usage” freeze disappears entirely.
You can check which type you have by opening Task Manager, clicking Performance, and looking at the disk entry — it will be labelled HDD or SSD.
If it is an HDD, look at whether your laptop supports a 2.5-inch SATA SSD or an M.2 NVMe drive; NVMe is considerably faster where supported. You can clone your existing installation using free tools provided by most SSD manufacturers, or perform a clean Windows install for the best result.
A capable 1 TB SSD is now inexpensive enough that it is almost always a better investment than replacing the entire laptop. Our Reviews section covers current storage options in more detail.
15. Reset Windows as a Last Resort
If you have worked through everything above and the machine is still slow, a clean reset will eliminate years of accumulated software residue in one step.
Go to Settings → System → Recovery → Reset this PC. You will be offered two options:
- Keep my files — removes apps and settings but preserves your documents. Good for most cases.
- Remove everything — a complete wipe. Choose this if you are selling the laptop, or if you want the cleanest possible result.
Back up everything important to an external drive or cloud storage first, regardless of which option you choose. Also make sure you have your Wi-Fi password, browser sync login and any software licence keys to hand, because you will need to set everything up again afterwards.
Budget two to four hours for the reset plus reinstalling your applications. It is the most time-consuming fix here, but it reliably works.
A Sensible Order to Work Through
If you want a quick plan rather than fifteen separate projects, do it in this order:
- Fifteen minutes: restart properly, disable startup apps, clear temporary files.
- One hour: update Windows and drivers, run a malware scan, tidy browser extensions.
- One evening: clean the vents, run SFC and DISM, disable background apps and visual effects.
- If still slow: check RAM usage and drive type, then upgrade whichever is the bottleneck.
Test the laptop after each stage. Knowing which specific change fixed the problem is valuable if it ever comes back.
Frequently Asked Questions
Why is my Windows 11 laptop slower than it was with Windows 10? Windows 11 has slightly higher baseline requirements, particularly for graphics and memory. On hardware close to the minimum specification, the difference is noticeable. Disabling visual effects and reducing startup load usually closes most of the gap.
How much free storage should I keep? Aim for at least 15–20% of total drive capacity free. On a 256 GB drive that means keeping roughly 40–50 GB available.
Do PC cleaner and optimizer apps actually help? Rarely. Most duplicate functions Windows already performs, some install additional background processes of their own, and a few are outright adware. Storage Sense and Task Manager cover almost everything a third-party cleaner claims to do.
Is it worth repairing an older laptop or should I replace it? If the machine is under five years old and the bottleneck is storage or memory, upgrading is almost always better value. If the processor itself is the limitation, or the battery and hinges are failing too, replacement makes more sense.
Will disabling startup apps break anything? No. The programs remain installed and fully functional — they simply will not launch automatically. You can re-enable any of them from Task Manager at any time.
Final Thoughts
A slow laptop is almost never a hardware failure. It is the cumulative result of software that has been allowed to grow unchecked, a drive that has filled up, vents that need cleaning, and drivers that have fallen behind.
Work through this list methodically and you will very likely find that the machine you were ready to replace has plenty of life left in it. Start with the free software fixes, because they cost nothing but time and resolve the majority of cases. Move to hardware only once you have confirmed with Task Manager that memory or storage is genuinely the constraint.
For more practical guides like this one, browse our How-To / Tips & Tricks section, and see Mobile & Gadgets for device-specific advice.